Post by Merle Read and Susan Milligan
February’s Local SfEP Group meeting in Glasgow covered some exciting topics, including training events north of the border, writing more useful blog posts and the coming Scottish mini-conference. But there was also the added bonus of an extremely handy presentation on Word tables by two of the Glasgow Editors’ Network’s most experienced members, Merle Read and Susan Milligan. And this was just too useful not to share!
Whether you’re an experienced copy-editor or just starting out, editing tables can be tricky and, frankly, a bit of a faff. But with these tips* from Word gurus Merle and Susan under your belt, your efficiency will increase in no time.
* Instructions given refer to Word 2013, but plenty of the advice will apply to other versions of the program.
Getting organised in Word
Authors often use tabs or hard returns in the wrong places to make the table look right in Word: toggle Ctrl/Shift+8 to show these (or use ¶ on the Home tab). Remove unwanted spaces/tabs/returns. The typesetter will take care of the look.
Show the ruler (via the View tab) to enable easy resizing of columns, alignment of decimal tabs etc.
Use Tab to move forward and Shift+Tab to move backward in a table. Use Tab in the last cell of a table to add an extra row, or press Return with the cursor at the very far end of a row to insert a new row immediately below.
If you want an actual tab, use Ctrl+Tab.
Make a few keyboard shortcuts (instructions below) to add/delete table rows, e.g.
Alt+F9 insert row above the cursor
Alt+F10 insert row below the cursor
Alt+F11 delete current row (repeat as required to delete the table)
Changing the design and layout
To alter the table design or layout, place the cursor in the table and use the Design or Layout tabs that then appear on the ribbon or right-click for a menu that allows you to insert/delete/merge cells/rows/columns, change text direction or alter other table properties. NB merging neighbouring cells can sometimes mess things up: use with care, preferably once the rest of the table editing is complete.
You can also use the mouse to hover over various parts of the table to enable you to alter the design/layout. Hover over a line to click and drag the column width, or click on the 4-arrowed cross at the top left corner (appears when the cursor is within the table) to bring up a mini-ribbon of options:
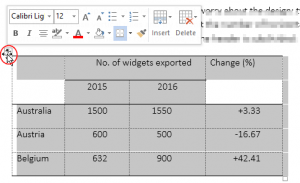
Click on the cross and then press Delete to remove the table content but leave the structure intact (it may be useful to copy & paste the skeleton if you have similar tables to edit).
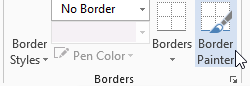
Use the Border Painter in the Design tab to remove/add lines (set to No Border or a specific line width as required) by drawing the cursor over the lines. Esc key to cancel.
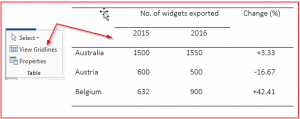
Choose the View Gridlines option in the Layout tab (the cursor must be in the table unless you have set up a shortcut to ShowTableGridlines).
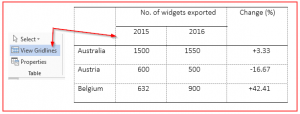
This allows the structure of the table to be clear even though various cell borders will be invisible in the final version:
To view an extra-wide table that disappears off the edge of the page, use Draft view (but when editing it check that it is not too wide for the page size for which is it destined in print). You could also select the table and reduce the font size for a better fit: let the designer worry about the look! Or change the page format to landscape (you may need to insert section breaks if the other pages are to remain portrait).
If copy & pasting, make sure the number of rows/columns being copied is no larger than the area of the table being pasted to.
Avoid using Track Changes when editing tables if possible (or at least don’t use it when formatting).
Checking your table is correct
Convert table to text and text to table (Insert tab, Table menu) as a temporary tool while editing (e.g. 2-column lists). This is also a way of testing whether a table is presented correctly – a correct table should convert to text and back again (one cell – one entry – no hard returns within cells).
To align numbers in columns on the decimal point (or on the right-hand digit if there is no decimal point), first left-align the column and then select the decimal tab from the top left of the ruler; then, with the whole column selected, place the tab on the ruler above the column heading at your chosen position.
Achieving consistency with Word tables
To format a series of tables consistently, use Word’s styles (either in the document or, preferably, in a custom template attached to the document). You can create paragraph styles for table title, column heading, table stub, table body, table bottom row (for tables that have a ‘Total’ row at the end), etc. If you base them all on one core style (e.g. ‘table text’), all will change if you make a change to that style (e.g. to change the font).
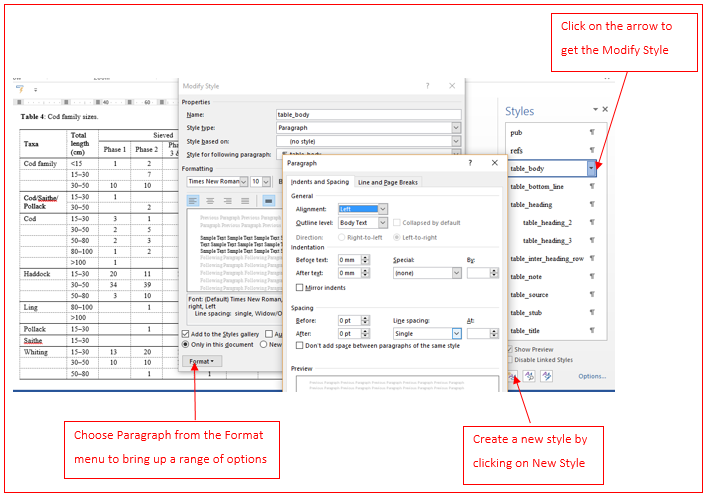
It’s fine to use the same font, size, formatting, and paragraph attributes for all the table styles if you are using styles not for the sake of the appearance of the tables (as it is the typesetter’s job to design them) but for efficiency and consistency. List the styles used for the typesetter, who can then convert the Word styles to the desired formatting in InDesign.
What if there are footnotes in the table?
If your author has embedded tables in a document that have auto-numbered notes, check that the tables don’t contain footnotes that are part of this numbering system. If they do, take these notes out of auto-numbering (or cut and paste the tables into a new document) and manually renumber the table footnotes (using alphabetic rather than numeric numbering). If a table just has one note, you can use an asterisk to indicate it (depending on house style). If it is a note that applies to the whole table, it will just appear below the table as ‘Note. …’.
There may also be a ‘Source’ below the table, normally positioned after any table note(s).
How to add a keyboard shortcut
Go to File/Options/Customize Ribbon/
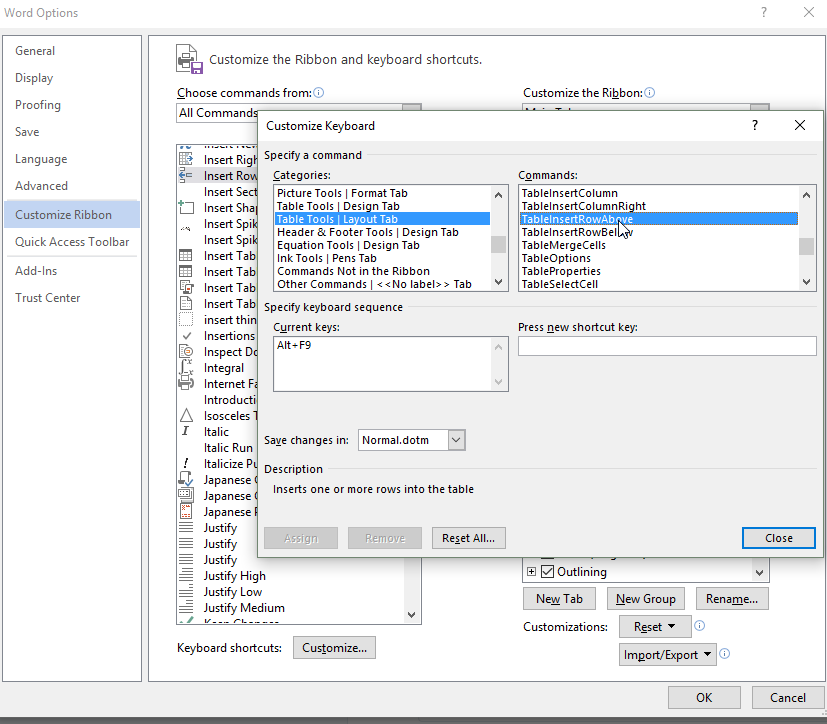
In the Categories box choose Table Tools | Layout Tab.
In the Commands box choose e.g. TableInsertRowAbove.
In the Press new shortcut key box, type the desired key combination, e.g. Alt+F9 (check it’s not already assigned to something you already use: if so, “Currently assigned to …” will be displayed).
Click Assign (essential!) then either return to the Commands box to add another shortcut, or click Close.
Keep a reminder of your shortcuts by printing them out. Bring up the Print dialog box. Under the Settings heading click on the Print All Pages dropdown. Under Document Info, choose Key Assignments, then click Print.
Do you have any tips of your own to add to these? Be sure to leave a comment. Or if you’d like to find out more, we’ve listed some relevant resources below.
Further reading
Butcher’s Copy-editing, 4th edn, pp. 220–9
Scientific Style and Format, 8th edn, ch. 30; 6th edn, ch. 31, pp. 678–93
See also https://wordribbon.tips.net/C0683_Tables.html
ABOUT THE AUTHORS
Susan has learned about tables over the years by having to deal with them when editing on screen, as well as from an SfEP conference workshop on the subject by Penny Howes in 2009. Tables used to be a chore but she now enjoys getting to grips with them.
Merle (@MA_Read) has been wrangling with Word tables for over 20 years and tries to do so as efficiently as possible.